Buenos Aires Herald

Hopping down the bunny trail

Rabbit pepperoncino

Buenos Aires Herald
On Sunday supplement
Food and Wine

Tastes like chicken. You know that’s not true, everyone says that to try to get you to eat something different in the lighter meat category. I’ve taken to telling people it tastes like cuy, or guinea pig, a delectable treat throughout the lands of our neighbors to the northwest in Peru. It kind of gets the point across. When it comes down to it, rabbit tastes like, well, rabbit.

With spring firmly arrived, rainstorms and all, the annual season of blackouts already beginning (last year our part of Recoleta got to 19 of them, ranging between 2 hours and 3 days, this week we launched in with a 2-1/2 day stretch already), we’re cooking with gas, on the grill, and by flashlight (for lighting purposes, not cooking, a decidedly ineffective method I’m sure). It’s rabbit cooking time.

If you’ve never cooked with rabbit, the thing to know is that it’s really, really lean. It’s probably got a BMI that would make Kate Moss seem rubenesque. As such, you need to consider a couple of things – adding fat to the dish, and cooking time. The latter has to be either very quickly – usually for the rabbit loin section, or long and slow, for the other joints. I generally find that the best bet is a braise or low heat saute that goes long enough to tenderize the meat.

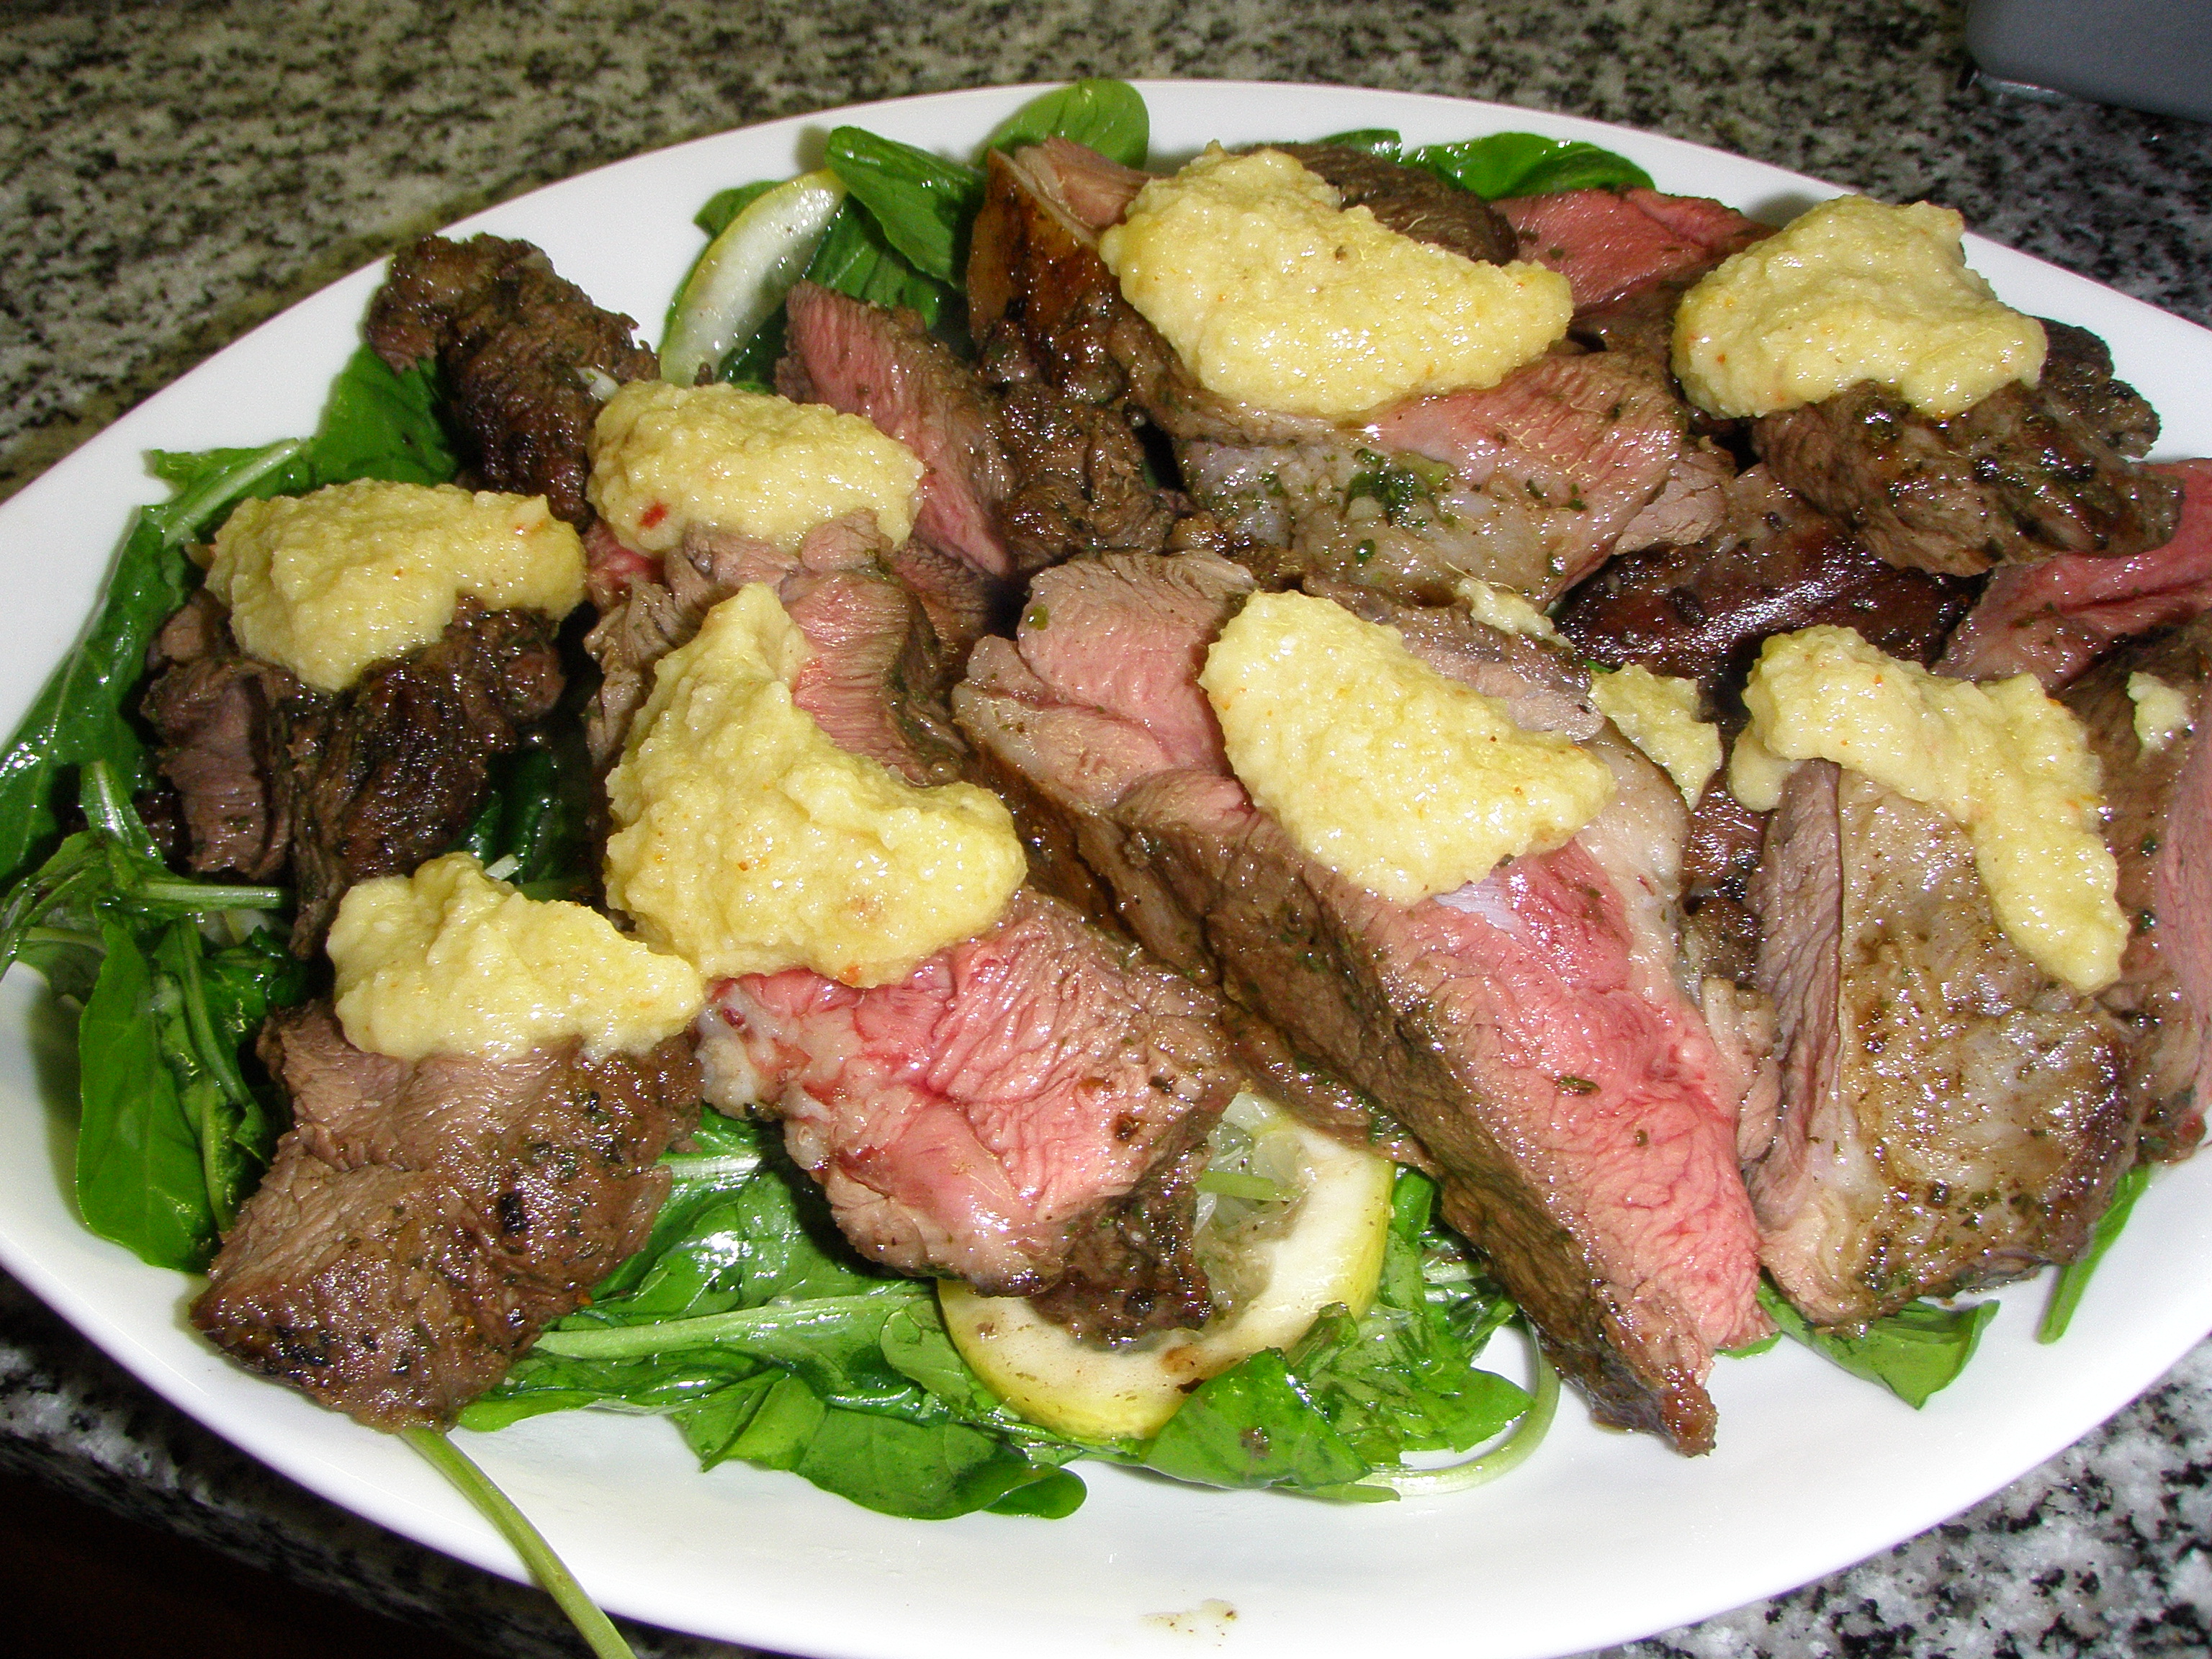
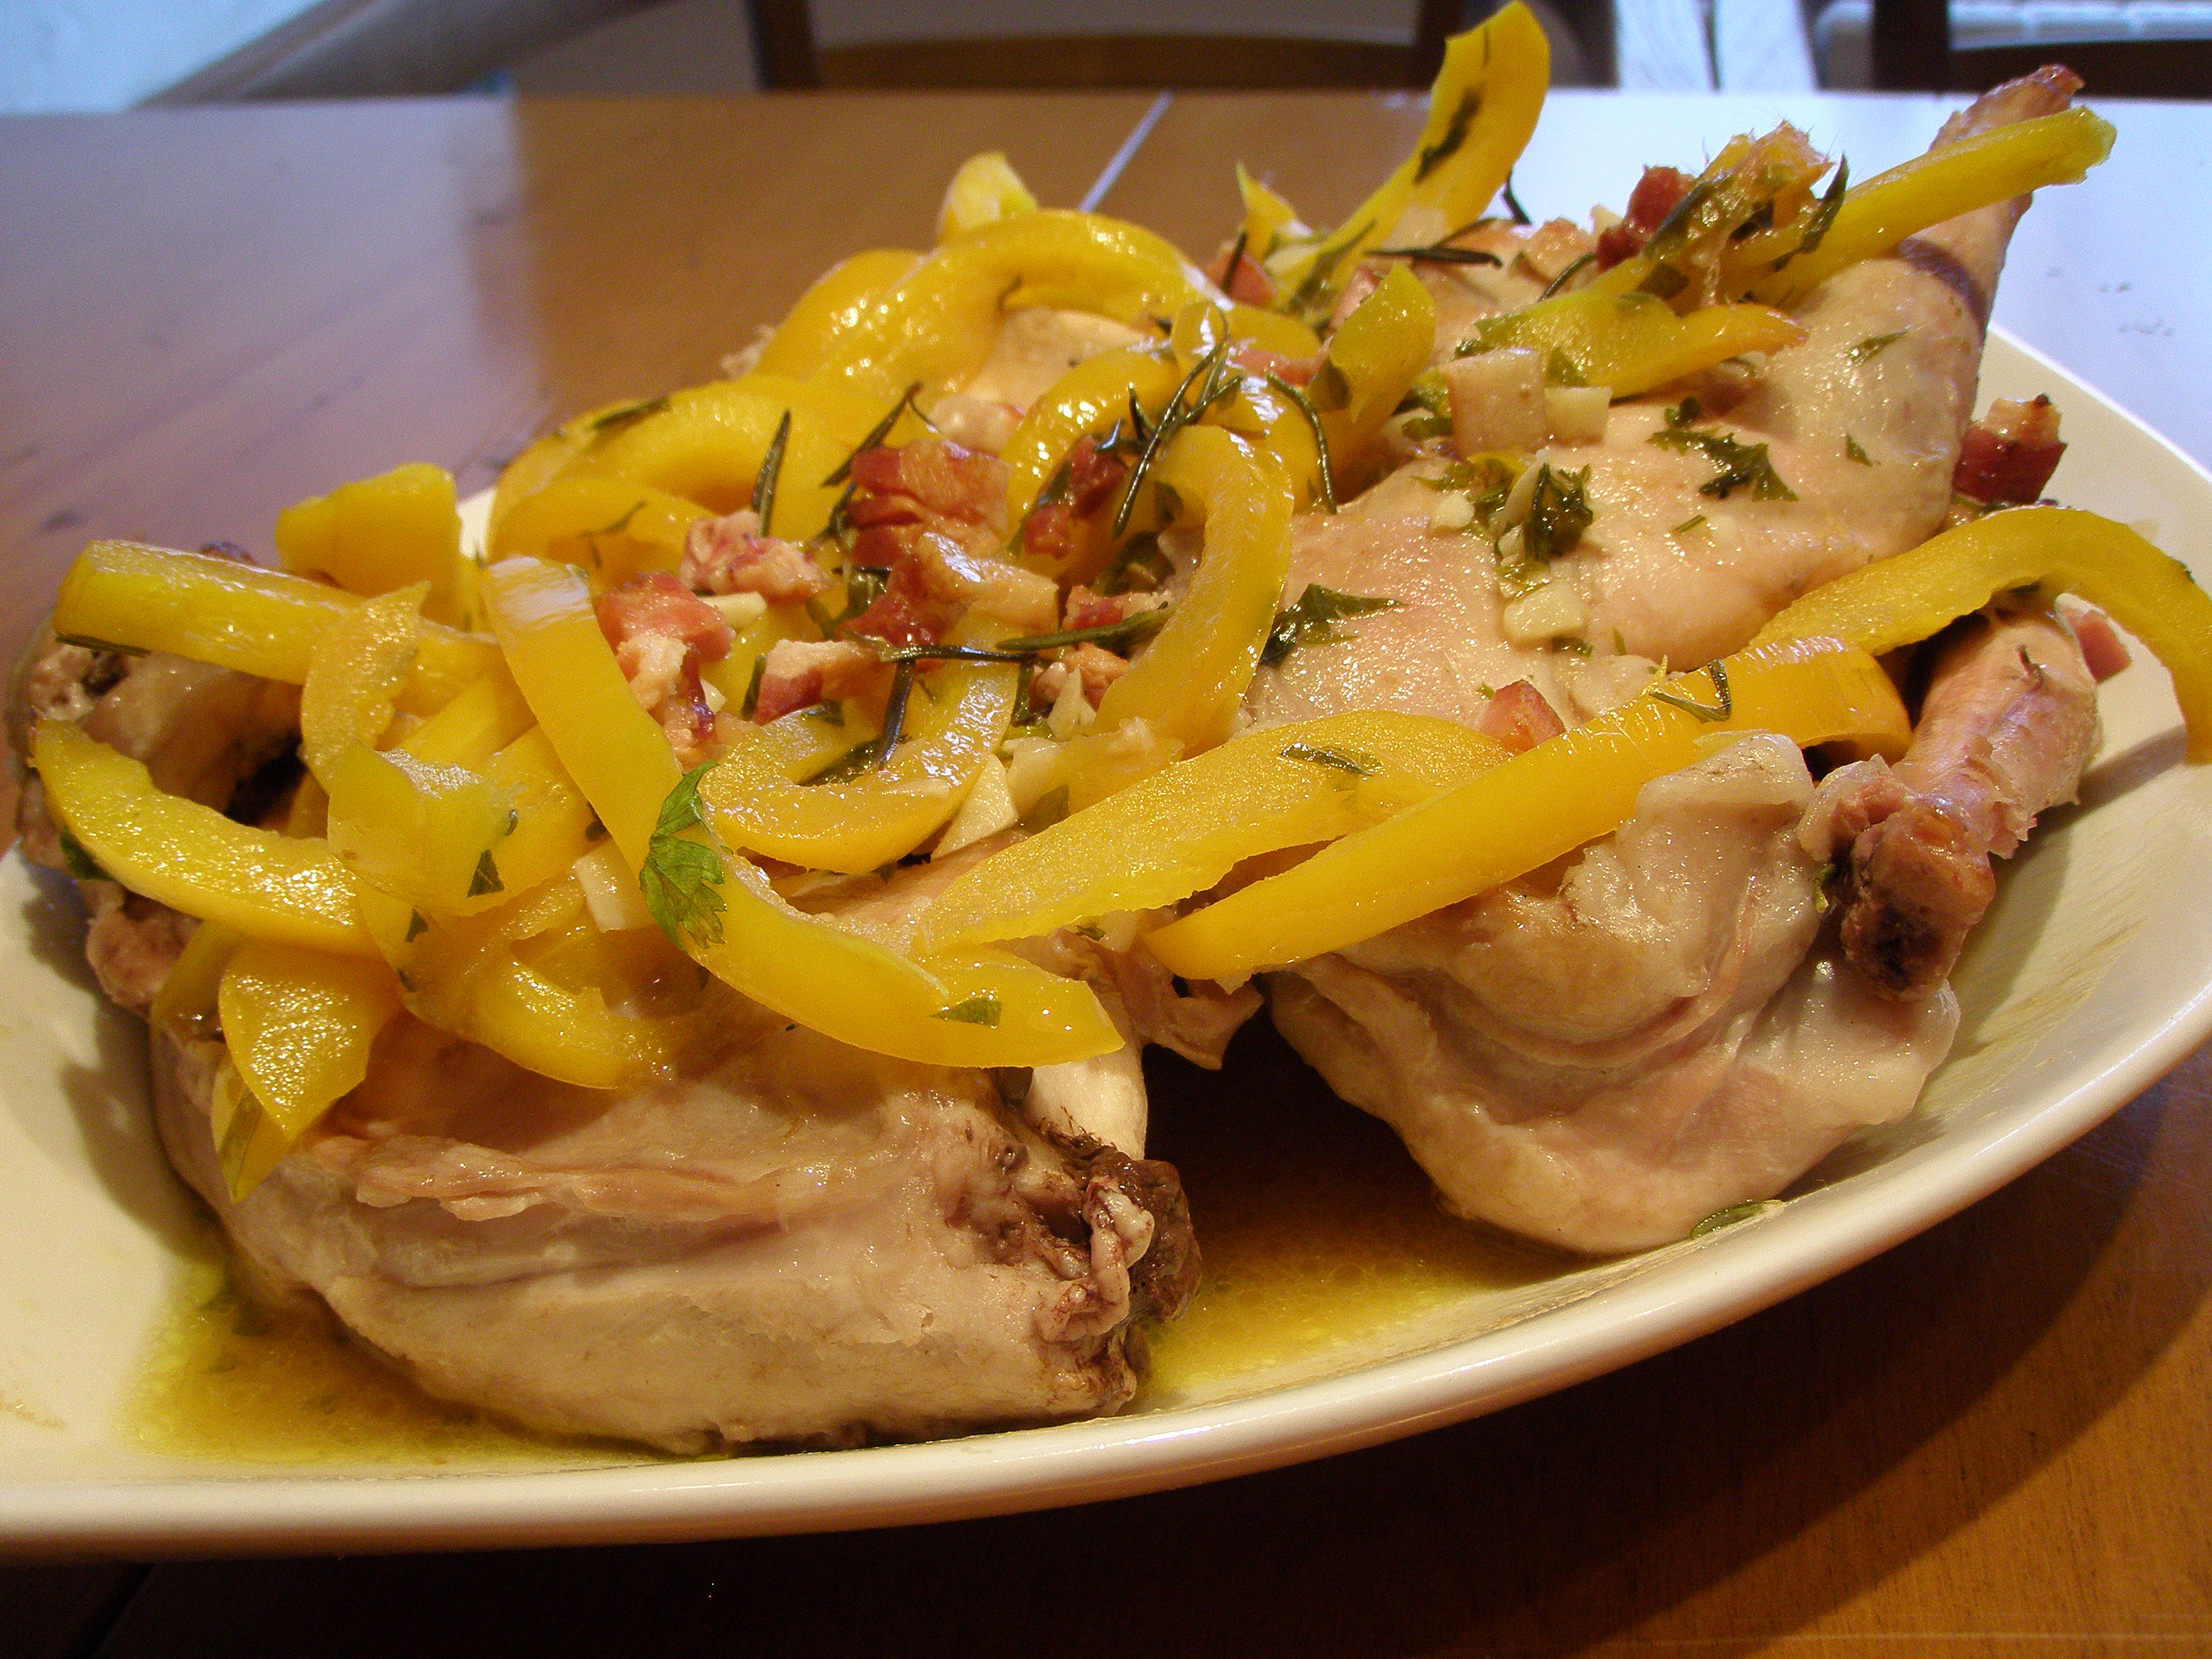
One of my favorite dishes is based on a Piemontese classic – Coniglio Con la Peperonata. For those of you just not up to trying rabbit (but really, give it a try, it’s delicious), this dish can be made with chicken – it won’t be the same, rabbit and chicken really don’t taste alike, though they’re both mild, but it will still be a tasty dish.

Rabbit with Sweet Peppers

1 1-kg rabbit
60 gm smoked bacon, chopped
1 tablespoon fresh rosemary leaves stripped from the stalk
4 tablespoons butter
1 tablespoon olive oil
2 fresh bay leaves
250 ml chicken broth
salt and pepper

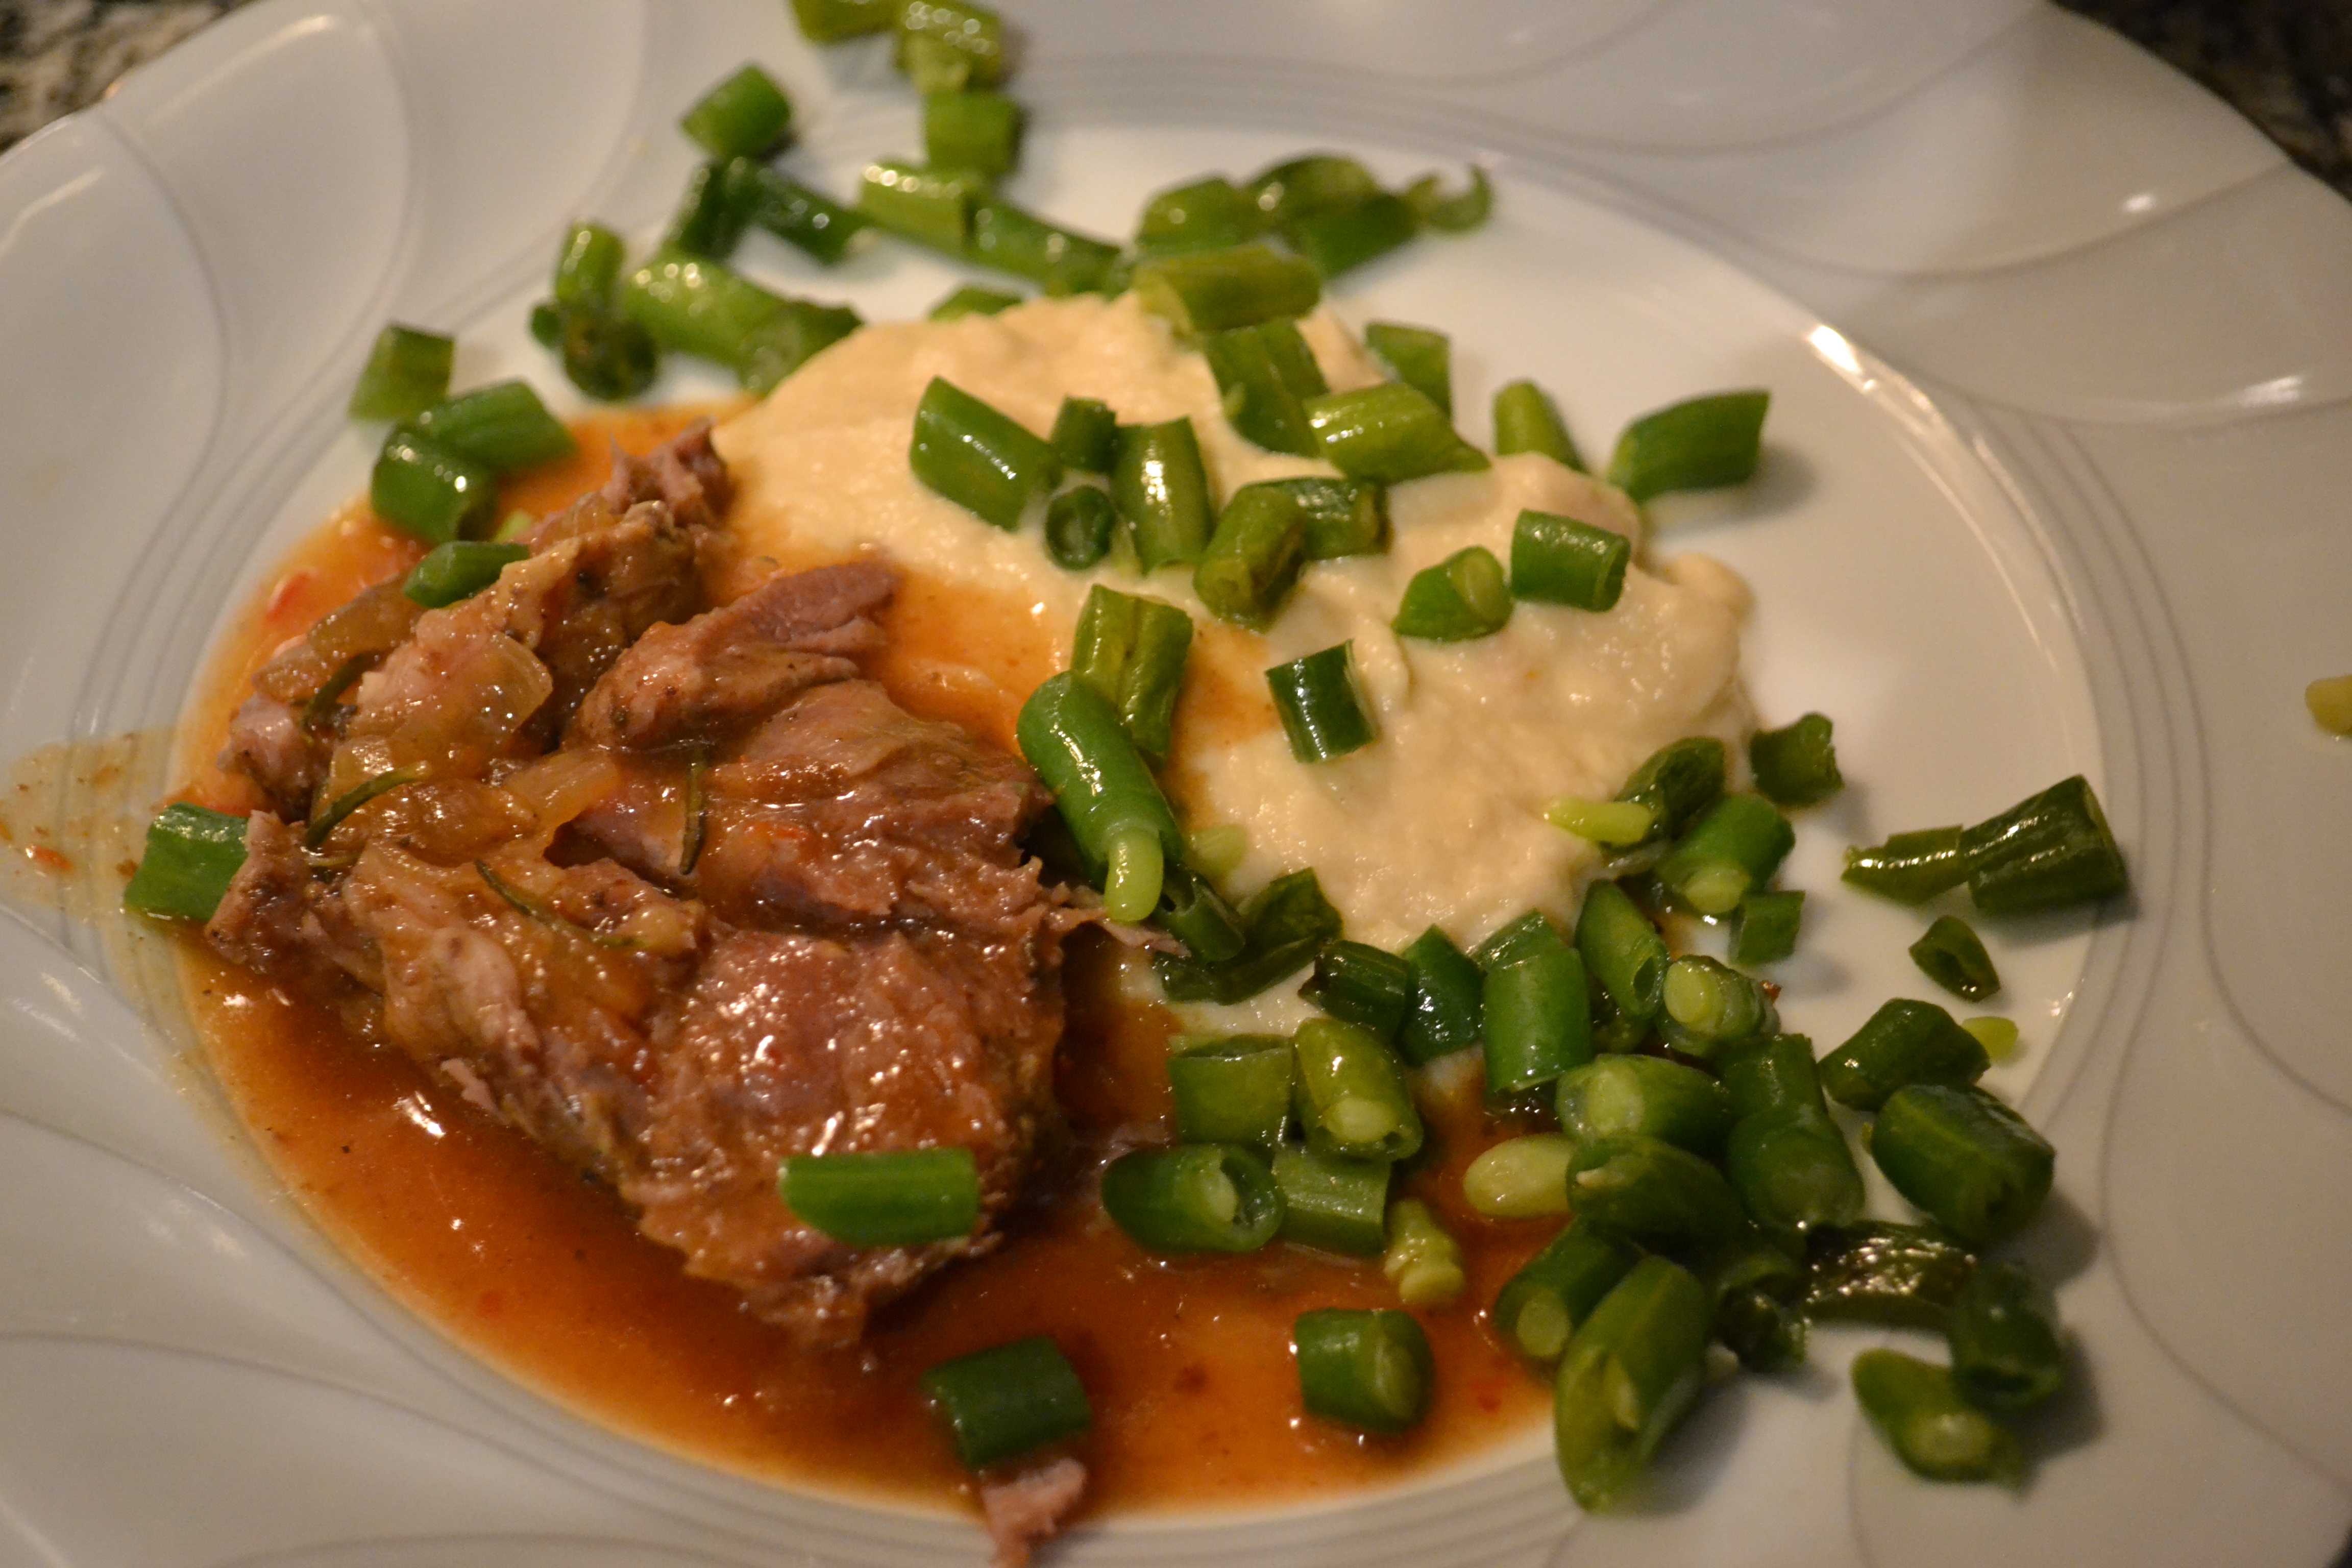
Cut the rabbit in serving pieces – usually that means cutting six pieces – cut across the body at the front and back of the loin and rib section, then cut each of the three sections in half down the middle. Saute the bacon and rosemary in a mix of the butter and olive oil, then add the rabbit pieces and cook until browned. Add the bay leaves and stock, salt and pepper to taste, and let simmer over low heat for 35 minutes, turning the pieces occasionally. Move to a serving platter.

While the rabbit is simmering:

3 red or yellow bell peppers or a mix
4 tablespoons butter
1 tablespoon olive oil
3 oil-packed anchovies
2 cloves garlic, chopped
handful of parsley, chopped
4 tablespoons red wine vinegar
salt and pepper

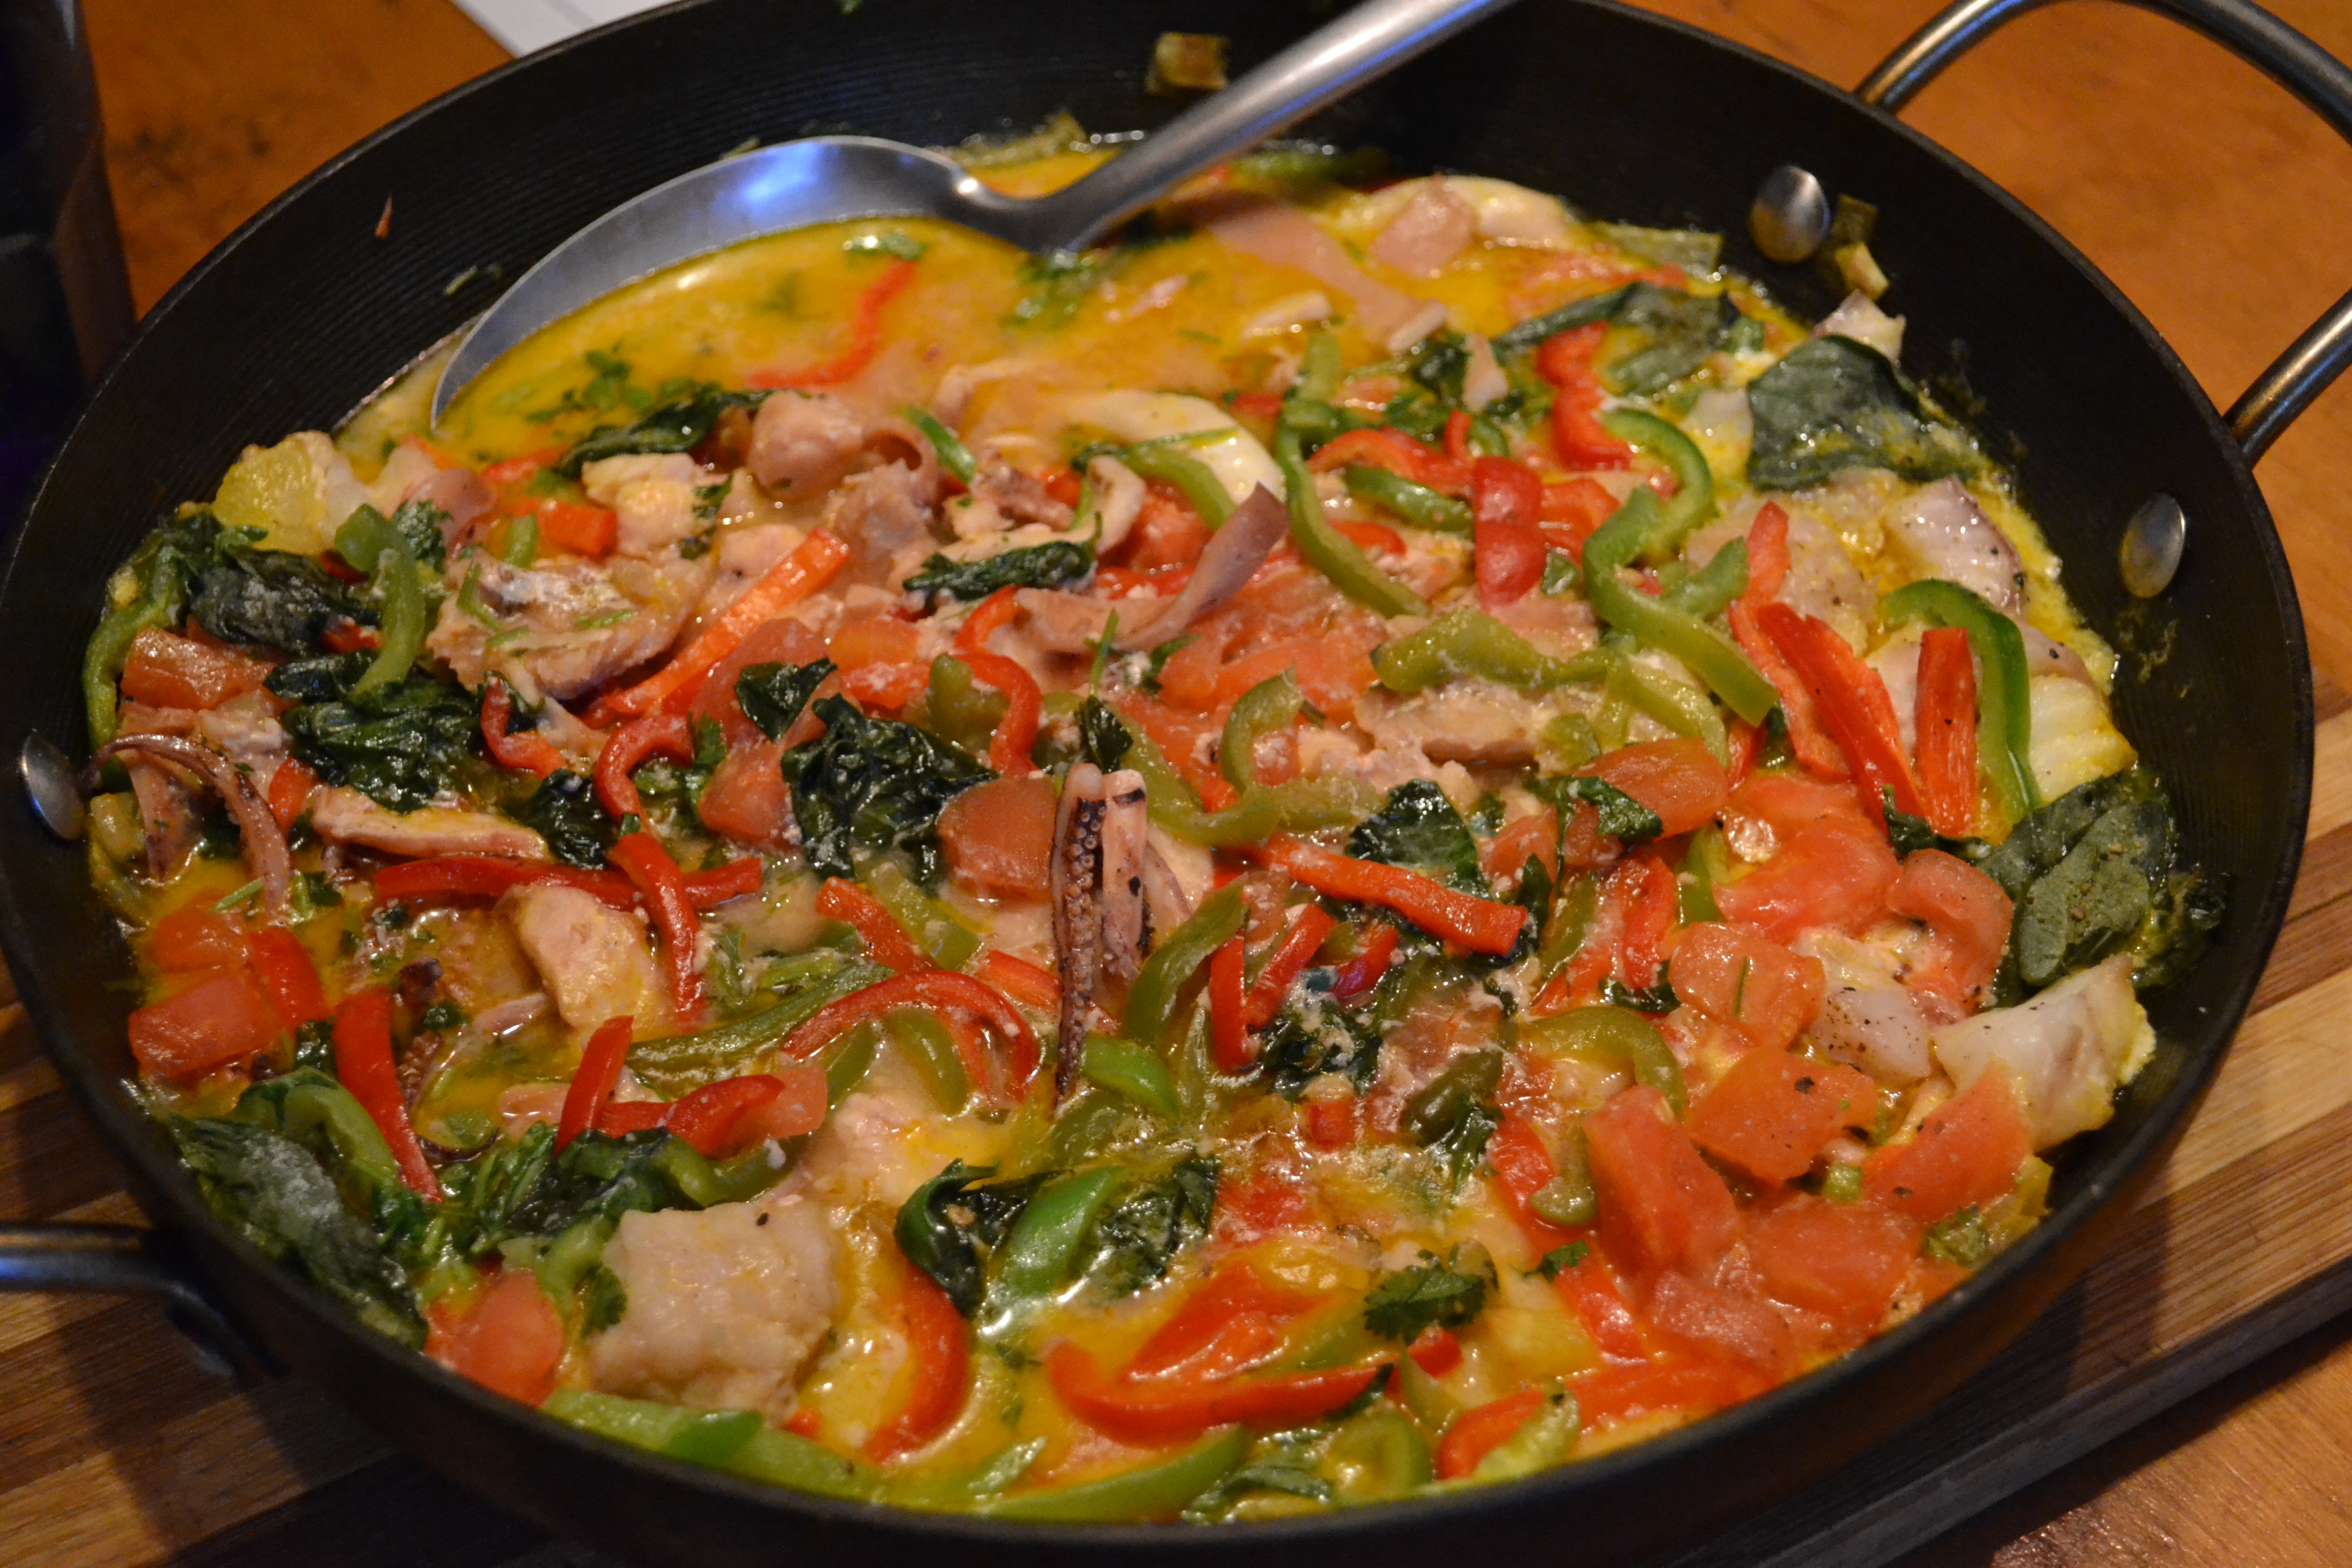
Warm the butter with the anchovies and stir until they dissolve. Add the peppers and raise the heat and cook until they’re starting to get limp. Add the garlic, parsley, and vinegar and cook until the vinegar has just evaporated. Season to taste. Pour over the rabbit pieces.

Now, although there are six serving pieces here, a one kilogram rabbit divided six ways, after factoring out the bones, isn’t a whole lot, so I generally recommend figuring on two pieces per person, though that obviously depends on what else you’re serving for dinner. Or, perhaps a light lunch, where one piece may well be enough.

What to drink with this? In Piemonte we’d be downing a bottle of Barbera or a lighter Nebbiolo with it. Neither is common here – the only Nebbiolo I know of produced in Argentina is the excellent one from Familia Cecchin of Maipú, if you can lay your hands on a bottle. There are a few Barberas around, and several blended with other grapes, a perennial favorite is from Famila Adrover in Lujan de Cuyo. Or, a lighter Bonarda, there are many to choose from.

A series of recipes and articles that I started writing for the Buenos Aires Herald Sunday supplement, Food & Wine section, at the beginning of 2012. My original proposal to them was to take local favorite dishes and classics and lighten them up for modern day sensibilities. We’re not talking spa or diet recipes, but at the very least, making them healthier in content, particularly salt, fat and portion size. As time went by, that morphed into a recipe column that, while emphasizing food that is relatively “good for you”, wasn’t necessarily focused on local cuisine. At the beginning of 2013 I decided to stop writing for them over some administrative issues, but it was fun while it lasted.

Facebooktwitterredditpinterestlinkedinmail

Like lambs in clover

Grilled lamb salad with pesto

Buenos Aires Herald
On Sunday supplement
Food and Wine

Now that warm weather, maybe even hot weather, has established a firm footing for the year here in BA it’s time to start thinking about lighter dishes that fit that springtime atmosphere. Just two weeks ago I was writing about slow braised lamb shoulder and here I’m about to write about lamb again. After all, I promised in that column that I’d share a recipe for a delicious little spring lamb salad.

Actually, the original recipe more often features leg of kid, or goat, than lamb, but both work beautifully and certainly the leg of lamb is easier to find here. And, goat is a leaner, healthier meat for you, so if you can find it, I highly recommend using it for this dish.

Now I’m not going to claim full credit for this. In Sicilian tradition there’s a classic goat and almond stew called capretto con le mandorle or capretto alle mandorle – “goat with/and almonds”. A few years back New York chef Mario Batali decided to lighten it up and come up with a barbecued goat dish that featured some of the same flavors, but serve it up as a room temperature or just slightly warm salad for summertime. My version is based on his, though he goes the route of slow cooking the whole leg of goat or lamb off to the side of the grill, with indirect heat and slicing it afterwards. And some adjustments in ingredients that I like better.

I do recommend getting yourself in the mood by heading over to YouTube and searching out Jack Strachey’s Lambs in Clover – you’ll be ready to head right to the grill, or stove-top, and start cooking this up. Promise.

Grilled Goat (or Lamb) Salad

Meat:

1 kg leg of goat or lamb (without bone), sliced into serving pieces
1 bunch of mint
2 sprigs of rosemary
6 cloves garlic
2 tablespoons each of coarse salt and cracked black pepper
150 ml olive oil

Blend all ingredients except the meat together to form a smooth paste. Coat the slices of meat in it and leave to marinate for at least two hours – even better if you can leave it overnight.

Fire up your grill or your stove-top bifera or cast iron griddle and get it nice and hot. Cook the meat to your preference – personally I recommend medium rare to medium, no more than that – just be careful not to take it to the point where it gets tough.

Salad:

2 lemons
2 oranges (preferably navel oranges)
75 ml olive oil
1 tablespoon each of salt and cracked black pepper
2 bunches of arugula, washed and shaken dry

Slice the citrus fruits very thinly, remove the seeds, and toss with the olive oil, salt and pepper. Let sit for an hour. Just before you’re ready to serve, toss these on the grill or griddle and let them get just a little bit of charring on all sides.

Spread the arugula out on a serving platter and top with the citrus slices and the pieces of goat or lamb. The dish can be served while the meat is still hot, or left to sit and let the juices commingle, and serve it warm or room temperature.

Pesto:

150 grams almonds (whole or slivered), toasted
20-25 green olives, pitted
1 fresh hot chili
juice of one orange
60 ml olive oil

Blend all pesto ingredients until nice and smooth. Serve dollops over the top of the meat. Feel free to adjust the spiciness with either an extra chili, or if you want less, remove the seeds from the chili already noted.

If I may, I’m going to also recommend a wine with this dish – a fantastic match with a well chilled Syrah/Shiraz or Tempranillo rosado. If you must go full on red, stick with the same grapes but give the wine just a short period chill, maybe 30 minutes in the refrigerator, before serving. Enjoy your spring picnic!

A series of recipes and articles that I started writing for the Buenos Aires Herald Sunday supplement, Food & Wine section, at the beginning of 2012. My original proposal to them was to take local favorite dishes and classics and lighten them up for modern day sensibilities. We’re not talking spa or diet recipes, but at the very least, making them healthier in content, particularly salt, fat and portion size. As time went by, that morphed into a recipe column that, while emphasizing food that is relatively “good for you”, wasn’t necessarily focused on local cuisine. At the beginning of 2013 I decided to stop writing for them over some administrative issues, but it was fun while it lasted.

Facebooktwitterredditpinterestlinkedinmail

Love your dimples

focaccia

Buenos Aires Herald
On Sunday supplement
Food and Wine

Almost everyone loves focaccia, the semi-flatbread that is a cross between pizza dough, bread, and the love child of olive oil and salt. Here in Argentina it’s likely the hidden origin behind local favorites fugazza and fugazetta, and I’ve seen some versions that were made on focaccia, but these days, the majority seem to be on a pretty standard pizza base.

The bread’s origins are supposed to have been from the Roman incursions into the area of the modern day Middle East, where they discovered local, unleavened flatbreads – the things that we know today from their descendants of pita, lavash, and similar breads. These were and are used both to dip into sauces and spreads, and as an adjunct to eating by hand, using them as a scoop for whatever’s on your plate. The Romans apparently loved the idea and carted it back with them when they were sent packing.

Now, it’s pretty clear that this was the origin of the pizza, and the dough used for pizza making is definitely more similar to the flatbreads of the Levant. And, focaccia likely came about the same way. The name is an Italian contraction of the original Latin, panis focacius, essentially “bread from the fireplace” – a bread cooked directly in the hearth rather than in an oven or in a mold of some sort.

But what’s the difference between pizza dough and focaccia? For the most part they look fairly similar, other than that the exposed top of the latter gets browned and then drizzled with olive oil, salt and, usually, herbs. There are two big differences though, and they really are quite different breads. Focaccia contains a large amount of olive oil right in the dough, far more than a pizza dough, and also more liquid – a 1:1 ratio wet to dry ingredients. It’s a very wet dough and a bit of a pain to work with, but the results are well worth it to do it right.

If you have a mixer with a dough hook, save yourself a huge amount of effort and use it for this. It’s do-able by hand, but hard work.

Focaccia

½ kg 000 flour, or better yet, high-gluten flour (harina glutinada)
2 teaspoons table salt (10-12 gm)
½ cube fresh yeast (25gm) or 1 packet instant dry yeast
140 ml olive oil
360 ml room temperature water
sea salt
fresh rosemary and/or dried oregano

Sift the flour into a large mixing bowl (if using a mixer, sift into the mixer’s bowl and run it on low to medium speed at this point). Mix the salt into the water and stir to dissolve – this will help distribute the salt better in the dough. Add the yeast, about a third of the olive oil, and two thirds of the water and mix well. Continue to add the water, a bit at a time, until it’s all incorporated.

If doing this by hand, pour another third of the olive oil onto a flat, clean counter surface and turn the dough out onto it (if you’re using a mixer, pour that third of the olive oil into the bowl and turn up the speed to medium-high). The dough will be very wet and sticky, almost like melted marshmallows. That’s fine, it’s exactly the texture you want. Instead of the usual pressing and folding type kneading that we’re used to for bread, you’re going to have to keep scooping up the dough, stretching it out, and sort of slapping it back down – get a good rhythm going of scoop, stretch and slap and just go at it for about 15 minutes. Gradually the dough will get less wet and stick and become very elastic and shiny (it will also incorporate most of the oil on the counter). In a mixer, speed it up to full and it will take about 7-8 minutes to reach the same point.

Put the dough in an oiled container and cover with a clean dish towel and let it rise until doubled in volume, about an hour. Unlike a bread dough, we’re not going to punch it down to knock the air out of it, we want as many of the air bubbles we developed as possible to stay in the dough. Pour about half of the remaining olive oil onto your baking tray, place the dough on it and gently press it out to cover the entire tray (a large pizza pan works well too). Cover with the towel again and let rise until doubled again, roughly an hour.

Use your fingertips and press dimples into the dough at regular intervals. Drizzle with the last of the olive oil. Sprinkle with coarse or flaky sea salt and the herbs. Place in a hot (220°C) oven and bake for 15-20 minutes until it’s golden brown on top and sounds hollow when you tap on either the top or bottom. Let cool. Eat.

A series of recipes and articles that I started writing for the Buenos Aires Herald Sunday supplement, Food & Wine section, at the beginning of 2012. My original proposal to them was to take local favorite dishes and classics and lighten them up for modern day sensibilities. We’re not talking spa or diet recipes, but at the very least, making them healthier in content, particularly salt, fat and portion size. As time went by, that morphed into a recipe column that, while emphasizing food that is relatively “good for you”, wasn’t necessarily focused on local cuisine. At the beginning of 2013 I decided to stop writing for them over some administrative issues, but it was fun while it lasted.

Facebooktwitterredditpinterestlinkedinmail

We’re on the lamb

Garrón

Buenos Aires Herald
On Sunday supplement
Food and Wine

Spring has sprung, more or less, the temperature is doing the montaña rusa and the rains they be a falling. Yeah, that’s spring here in BA. One day it’s t-shirt and shorts, the next it’s sweaters and umbrellas. One day it’s ceviche on the patio, the next it’s a bowl of hearty, steaming stew.

In the kitchen, spring is all about bunnies and lambs. Or maybe that’s some sort of proverb. All I know is that once summer rolls around, it’s rare that I’m going a rustic dish of lamb, though, perhaps as the weather warms we’ll come back around to it with a delicious summer dish of thin slices with green olive tapenade, all over a citrus and arugula salad. Remind me about that down the line.

Let’s talk a little bit about sheep. There are a variety of different terms, depending on what part of the English speaking world you’re from. The three most basic are lamb, hogget and mutton, in that order – which are defined by their teeth. Yes, I know, you thought it had something to do with age, and, in some places it may. Or may not. Classically, a lamb has yet to have any “permanent incisors”, in other words, the tooth fairy has yet to visit. A hogget has, at most, two visits from said winged pixie, and a mutton has had more than two.

But, for example, in my home country of the U.S., by law, all of them are called lamb, or at least when they’re served on a plate. It doesn’t mean no one ever serves up a “mutton chop”… chefs are such mavericks. And even among the lambs there is variation – milk-fed lamb, lechon, is unweaned, less than 8 weeks old, and weighs in under 8 kilos; while spring lamb is 3-5 months old, and, not surprisingly, has to have been born in spring.

All too confusing and far less interesting than simply cooking one up, no? This week we’re going to look at a slow cooked lamb dish inspired by a traditional braise from our neighbors to the west in Chile, where typically it’s a way of using the garrón or antebrazo, or, the “forearms” that otherwise tend to end up tossed into stockpots for making broth. In our version, we’re using lamb shoulder, or paleta de cordero, though this will work with lamb leg as well.

Slow Braised Lamb Shoulder

1 kilo of lamb shoulder (weight without bone, so roughly a 2.5 kg shoulder)
1 large onion
3 cloves of garlic
1 tablespoon merkén (a Chilean dried pepper, if not available, use hot paprika – pimentón picante)
250 ml white wine
200 ml carton tomato puree
2 sprigs of rosemary
1.5 liters stock (lamb, beef, vegetable – from “cubes” is fine)
20 ml olive oil
salt and pepper
A choice here – you can have your butcher cut the shoulder into serving pieces if you like, or you can simply remove all the meat from the bones and cook this dish without them. You’ll get a richer braise with the bones in the pot, but, you’ll need a bigger pot.

Heat the oil in a stew pot big enough to hold all the lamb pieces. Brown the lamb pieces on all sides and then set them aside in a bowl for the moment. Add the onion and garlic to the pot and cook until lightly browned. Add the tomato puree and chili and cook for 3 minutes, stirring regularly. Add the wine and cook for about 5 minutes to blend the flavors.

Add the lamb pieces back in and top off with the stock – just enough to reach the same level as the lamb. Bring to a simmer, reduce the heat to a minimum, cover the pot and let it cook for about 2½ to 3 hours, until the lamb is completely tender.

Ladle out about 500 ml of the stock into a separate small pan, preferably a wider one, and place it over high heat – we’re just going to evaporate and concentrate the liquid down to become a rich sauce. When it’s the consistency of a nice gravy, reduced by about 2/3, season it to taste.

While the folks on the other side of the mountain typically serve their braised lamb with either potato or squash purees, much the same side dishes we see here, our favorite is to serve it up with a puré rustico of cauliflower – simply simmering the florets from a medium sized head of cauliflower in salted water until soft and then blending it in blender or food processor with a clove of garlic, a handful of chives, a small tomato, and oft-times, a slice or two of cooked bacon, salt and pepper to taste of course. Add some green vegetable if you like – quickly sauteed green beans are a family fave.

A series of recipes and articles that I started writing for the Buenos Aires Herald Sunday supplement, Food & Wine section, at the beginning of 2012. My original proposal to them was to take local favorite dishes and classics and lighten them up for modern day sensibilities. We’re not talking spa or diet recipes, but at the very least, making them healthier in content, particularly salt, fat and portion size. As time went by, that morphed into a recipe column that, while emphasizing food that is relatively “good for you”, wasn’t necessarily focused on local cuisine. At the beginning of 2013 I decided to stop writing for them over some administrative issues, but it was fun while it lasted.

Facebooktwitterredditpinterestlinkedinmail

One fine kettle of fish

Moqueca de peixe

Buenos Aires Herald
On Sunday supplement
Food and Wine

From the Kimbundu language, one of two dialects of Bantu, from the country of Angola, comes the word mu’keka, meaning, more or less, a kettle of fish. Literally, not sort of hot water that one finds oneself in after getting home late from a carousing with friends. It’s a dish that some say is reminiscent of bouillabaisse, but with local African flavors.

And, many of those flavors found their way to the shores of our neighbor to the northeast – after all, Angola was also a Portuguese colony, so it’s not a surprise that, shall we say, they imported a few folk from east to west. When the Portuguese arrived in the sixteenth century, they brought many traditional recipes from their culture, but not their traditional ingredients. Corn, cassava and manioc (or yuca) replaced the classic fava beans, rice and yams in various dishes.

Some of what are now the most important ingredients in Brazilian cuisine were brought from Africa by slaves, who carried with them their own culinary traditions – the dende palm and the oil of its fruit and new species of chilies like the fiery little malagueta pepper. In particular, the northeast region of Bahia makes use of many of these African ingredients and traditions.

And, one of the region’s most famous dishes is the moqueca, the word a simple re-spelling of where we started this column. At its heart it is the traditional African stew, but it brings in a touch of that Portuguese sort of fish chowder – a dish which if you think about it is a New England derivation of the Portuguese settlers to that part of the U.S., fused with a bit of British sensibility.

Now, there are probably as many recipes for moqueca as there are Bahians, and since the dish has spread from that region to nearly become a national dish, we can guess that there are millions more versions – in fact the original that I learned came from a Sao Paolo based chef. Not surprisingly here at home, we’ve spiked up the spices a bit, adding in a bit more chili and also a touch of ginger, and bit by bit changed the proportions of ingredients to fit our personal tastes. That’s just the way we roll around here.

Our Kettle of Fish – Moqueca de Peixe

1½ kg of pollack (abadejo) or other white fish, remove bones and cut in cubes
½ kg of squid, body cut in strips, tentacles separated
2 garlic cloves, finely chopped
2 teaspoons grated fresh ginger
1 large onion, chopped
2 tomatoes with skin and seeds removed, chopped
1 red bell pepper cut in thin strips
1 green bell pepper cut in thin strips
6 pickled malagueta peppers, chopped
1 small bunch cilantro, chopped
1 small bunch of basil, chopped
250 ml of coconut milk
juice of 1 lemon
4 tablespoons dende oil
6 tablespoons olive oil
salt and pepper to taste

In a wide pot (traditionally a heat proof ceramic pot), saute the onion, garlic and ginger in the oils, mixed together. Add the cubes of fish, squid, coconut milk and lemon and then scatter the remaining ingredients over the top, herbs last. Leave to cook over low heat without stirring, letting everything sort of slowly cook down until thickened, roughly 25-30 minutes. Serve over white rice cooked with bay leaf, with hot sauce on the side.

Notes on the ingredients: Dende oil is a vividly orange oil that comes from a palm tree. It has a unique aroma, one that when it first hits the heat reminds people, strangely, of a giraffe’s cage at the zoo. That dissipates rapidly and it imbues the dish not only with a lovely earthiness, but also a bright yellow-orange color. You can find it here in dieteticas and some specialty food shops, but if you don’t encounter it you can mimic the color with a teaspoon of turmeric.

Malagueta peppers are small, medium hot chilies that are found here pickled and packed in jars – your best bet is Barrio Chino, but you may find them in some gourmet food shops as well. If not, the local small pepper known as aji lino will do in a pinch.

Finally, if you’re not a fan of squid, substitute another shellfish or leave it out entirely and just add another ½ kg of fish to the pot.

A series of recipes and articles that I started writing for the Buenos Aires Herald Sunday supplement, Food & Wine section, at the beginning of 2012. My original proposal to them was to take local favorite dishes and classics and lighten them up for modern day sensibilities. We’re not talking spa or diet recipes, but at the very least, making them healthier in content, particularly salt, fat and portion size. As time went by, that morphed into a recipe column that, while emphasizing food that is relatively “good for you”, wasn’t necessarily focused on local cuisine. At the beginning of 2013 I decided to stop writing for them over some administrative issues, but it was fun while it lasted.

Facebooktwitterredditpinterestlinkedinmail

No fat wrap

Vegetable wraps

Buenos Aires Herald
On Sunday supplement
Food and Wine

It had to come up sooner or later, someone was going to ask about “fat free vegan” options for something at home. Something that wasn’t just an undressed salad or crispy rice cake. Thankfully, at least this time, they didn’t throw in “gluten free” or I might have just given it all up as a bad day. Combine that with just having worked my way through a couple of books on the subject and I was ready to tackle something new in the kitchen.

I don’t know that I need to get into the pros and cons of either a vegan lifestyle or an ostensibly fat free one. There’s plenty of source material out there that comes down on either side of the questions, and I think I can safely leave it in your hands to make your own decisions about what works for you. Want to go the other direction and head to a carb-free, meat heavy diet, you’re good to go from my perspective – whatever works for you.

I would say that I find the combo a bit restrictive. It’s not that one can’t come up with some great food to eat, and hopefully today’s recipe will give you a good example. It’s more that there’s so many ingredients out there that a diet like this leaves out – it’s one that I could never commit to without some overriding reason. But, as a change up for meals once or twice a week, it’s certainly a good balancer to whatever else I might be ingesting.

So what does a fat free vegan diet leave out? Beyond the obvious “no meat or dairy products”, including eggs, and, for most vegans, honey as well, the fat free restriction eschews chocolate, nuts, avocados, and all plant-based oils and fats – which, by the way, includes leaving out a large number of soy products unless they’re low fat versions. It’s not truly fat free, many vegetables and grains contain some level of fat naturally, but it’s a “no added fat” and no members of the plant kingdom that contain excessive amounts. Most folk who adhere to the diet are doing it for cardiovascular reasons, and so often, there’s a no added salt restriction.

So what that means is getting creative with vegetable purees, juices, herbs and spices for flavorings, generally some form of legume for those creamy mouthfeel sorts of experiences. And, that’s what we’re going to do today – a healthy, vegetable based wrap that makes for a satisfying lunch or lighter dinner. And, away we go.

First, the wrap – a whole wheat tortilla. You’d be surprised how easy these are to make – a simple 1:1 weight ratio between finely ground whole wheat flour and water – we get six decent sized tortillas out of:

175 grams whole wheat flour
175 ml/grams water
½ teaspoon salt (optional)
½ teaspoon smoked paprika

Mix well with a whisk to break up any lumps and let sit for about ten minutes to hydrate the flour. Heat a heavy skillet over medium heat. Divide the dough in six equal portions (or, 4 or 8, depending on how big you want them) and roll out to about a 20 cm circle. Lay them one at a time in the hot skillet – no oil needed. Cook until it’s lightly browned on the underside and then flip it over and cook the second side to the same. It should still be quite flexible. Repeat with each remaining tortilla.

For the filling:

¼ of a small red cabbage
¼ of a small white cabbage
2 green onions
1 medium carrot
4 asparagus
4-5 stems of cilantro
1 can white beans

1 can chickpeas
Juice and zest of 1 lemon
½ teaspoon cumin
1 small chili
2 cloves garlic
1 small carrot
1 tablespoon sesame seeds, toasted (optional, they add some fat)
water as needed

Slice the cabbage into thin shreds. Chop the green onion, asparagus and parsley. Grate the carrot. Open the can of beans. Toss them all together in a bowl.

Open the can of chickpeas – essentially we’re making a no fat added hummus. Pour the can into the blender and add the other ingredients. Blend at high speed, only add water as needed to get a smooth puree. Mix the puree with the vegetables and pile into the tortilla wraps. Roll up (if you want to make it pretty, stick a toothpick in it to hold it all together). Eat. Feel free, by the way, to mix up the vegetables with others, to use a different herb or a mix of them, and adjust the spiciness of the dressing with more or less of the chili and garlic.

A series of recipes and articles that I started writing for the Buenos Aires Herald Sunday supplement, Food & Wine section, at the beginning of 2012. My original proposal to them was to take local favorite dishes and classics and lighten them up for modern day sensibilities. We’re not talking spa or diet recipes, but at the very least, making them healthier in content, particularly salt, fat and portion size. As time went by, that morphed into a recipe column that, while emphasizing food that is relatively “good for you”, wasn’t necessarily focused on local cuisine. At the beginning of 2013 I decided to stop writing for them over some administrative issues, but it was fun while it lasted.

Facebooktwitterredditpinterestlinkedinmail

Thistle me a tune

Artichoke preparation

Buenos Aires Herald
On Sunday supplement
Food and Wine

When the same question pops up in your life several times in one week, with no particular impetus, the universe is trying to tell you something. Or, it’s just a coincidence. Pretty much the same thing. But it does get you thinking, or me thinking. So when three different people this week asked me “How do you prepare an artichoke?” it became a part of my daily thoughts. Fit in somewhere around waiting six days for the local cable conglomerate to get around to fixing service here in the ‘hood.

It’s one of those things I learned to do in cooking school a long time… more than a generation, ago. Maybe two. And it became something that I simply do, without thinking about it. But I get it, I mean, who thinks about preparing an artichoke? They’re pretty, but they’re daunting. It’s probably why my mother never did anything with them but snip off the tips of the “leaves” and then steam the heck out of them so that we could pluck them and scrape off the juicy “meat” at the bottom. I never had an artichoke any other way until I was out in the world, working in the restaurant industry.

So first off, just what is an artichoke? We’ve all seen them. Right now they’re in season here in BA and piled high in every verdulería. A month ago my neighborhood stand was selling them for 7 pesos apiece. This morning they were offering them up 4 for 10. Look at them closely – they look like a sort of scaly greenish pinecone or maybe something out of Avatar. What they are is a flower. A thistle flower. Actually, an immature flower surrounded by protective leaves. Now, as to what artichokes think they need protection from, I have no idea. But they’re protected.

There are several kinds of artichokes out there, either green or purple or a mix. All of them originated in Sicily, and from there, spread to wherever Sicilians and then later, Italians spread. The large green ones we see here are either the Camus de Bretagne or the Blanca de Tudela variety – I doubt I could tell the difference side by side, the biggest difference is simply size – unless you want to get into DNA testing. Argentina and Chile combined produce about 36% of the world’s artichokes. Who knew?

So, let’s get to it. I’ve provided a sort of step-by-step photo guide to see what the vegetable should look like after each process. Hopefully that’ll help.

1) set your artichoke on a cutting board. 2) using a large, sharp knife, cut across it about 2 cm from the base of the flower. 3) Turn it around and using a vegetable peeler, peel the stem down to the light green inner part (which is edible too). 4) Back to that big knife, place the cut side of the artichoke down on the board and just cut around on an angle, taking off the leaves and exposing the outer edge of the heart. 5) With a small knife, basically scrape out the seam between the stem and the heart that you can’t quite get to with either peeler or the big knife. 6) Get a spoon and stick in alongside the hairy “choke” in the center and then work it around in a circle to scoop out the choke. 7) Use the spoon to scrape out any remaining hairs, so to speak. 8) For this recipe, cut it in half lengthwise – though this will depend on what you’re going to make with them – and, stick them in a bowl of water with some lemon juice or vinegar to prevent them from turning brown in the air.

Artichokes “in Escabeche”

8 artichokes (1 little over a kilo)
1 lemon, cut in half and squeezed into a large bowl of water
240 ml extra virgin olive oil
1 bay leaf
3 large cloves garlic, peeled
½ teaspoon salt
1 tablespoon good quality sherry or fruit vinegar and more for drizzling
Extra virgin olive oil for drizzling

Prepare the eight artichokes as above and put in the bowl with the lemon water.

In a skillet, heat the olive oil over medium to medium-high heat until nearly smoking, about 10 minutes of preheating, then cook the artichoke hearts with the bay leaf until golden brown on the outside and until a skewer or knife tip glides to the center of the artichoke heart without too much resistance, about 5 to 6 minutes. Remove from the oil with tongs or a slotted spoon and transfer to a shallow serving platter or bowl.

Meanwhile, pound the garlic with the salt in a mortar. Stir 3 tablespoons of the oil you cooked the artichokes in into the garlic, ½ tablespoon at the time. Now, stir in the vinegar ½ teaspoon at a time until the garlic is a creamy looking sauce. Spoon small amounts of this mixture over the artichokes. Drizzle the artichokes with olive oil and a splash of vinegar and set aside to cool and absorb flavors before serving. Season with salt and pepper if necessary.

A series of recipes and articles that I started writing for the Buenos Aires Herald Sunday supplement, Food & Wine section, at the beginning of 2012. My original proposal to them was to take local favorite dishes and classics and lighten them up for modern day sensibilities. We’re not talking spa or diet recipes, but at the very least, making them healthier in content, particularly salt, fat and portion size. As time went by, that morphed into a recipe column that, while emphasizing food that is relatively “good for you”, wasn’t necessarily focused on local cuisine. At the beginning of 2013 I decided to stop writing for them over some administrative issues, but it was fun while it lasted.

Facebooktwitterredditpinterestlinkedinmail

A-maize-ing

Mexicali Corn

Buenos Aires Herald
On Sunday supplement
Food and Wine

You all know what corn is, right? Raise your hands if you do. Good, most of you anyway. Corn, or, more properly in most parts of the world, some variation on maize (the word derives from the native Taíno language where it is simply maiz, directly adopted into Spanish), is the most widely grown crop in the Americas, despite attempts to change that over to soy.

What you may not know is that it’s a hybrid plant. You go back a couple of thousand years and you find two entirely different plants that at some point either naturally or through human manipulation, were crossbred to produce some variety or another of maize. And there are some varieties – at least a couple of hundred different ones – there are more than a hundred just of what we think of as yellow (or white) sweet-corn. That doesn’t begin to get into the variations on colors that are available, the types with very large kernels common in the Andes, or the sorts used for making popcorn.

And, there are more recipes for what you can do with these golden ears of goodness than I’d care to count. On or off the cob, pureed, mashed, whole, boiled, steamed, fried, grilled, the list goes on and on. So I won’t.

Back when I was growing up in the 60s in the Midwest of the U.S. there was a sudden interest in “Mexican food”. We’re not talking about anything that anyone in Mexico would have recognized as Mexican cooking, but there was just this sudden appearance of dishes in all the ladies’ cooking and home magazines that included the just as suddenly available chili powders and other ingredients purported to make things… Mexican. Somewhere around that time the earliest versions of what came to be called Cal-Mex cooking, a sort of fusion of southern California ingredients and sensibilities with ideas and flavors supposed to be from Mexico. Some folks called it, early on, Mexicali instead, but that never really caught on, with the exception of one dish that took North American home economics kitchens by storm… Mexicali Corn.

As to just what the dish is, or was, seemed to vary with the magazine it was presented in. And with time, the ingredients have changed from those early years to much more elaborate, and, fresher ones. I’m pretty sure that when my mother prepared it (or, more likely, bought in lovely plastic bags of pre-mixed and frozen from either Birdseye or Green Giant), it contained corn, green and red bell pepper, maybe some onion, and a dash of the ever so exotic at the time, “chili powder”.

The thing is, the stuff is good. It’s really good. Especially if prepared right, with lovely fresh ingredients and spices. And that’s just what we’re going to do here. We tend to serve it alongside everything from grilled or sauteed chicken breasts to fish to whole, rice-stuffed calamari. Have fun with it!

Mexicali Corn

4 ears of fresh corn, still in the husk
1 red onion
1 red bell pepper
1 green bell pepper
3-4 cloves of garlic
2 jalapeños
1 teaspoon ground cumin
1 teaspoon ground coriander
1 small bunch of cilantro
2 limes
2 tablespoons of olive oil
salt and pepper

Once again we’re going to either fire up the grill or put a cast iron skillet on the stove top over high heat. Keeping the corn in the husk allows us to grill them until the kernels soften and lightly color, while the husk burns a bit but protects the corn itself. If your corn is already peeled you can cook it the same way, just turn it more often to prevent it from burning. Once you’ve grilled them well on all sides, remove them from the heat, let them cool, strip off the husk, and cut the kernels off the ears. The easiest way to do that is cut the ears in half across, stand the now flat cut surface on your cutting board, and use a good sharp knife to cut down along the cob in four or five cuts, top to bottom.

Chop the onions, peppers, garlic and cilantro. In a frying pan heat up the olive oil. Saute the onions, garlic, peppers and spices with a little salt and pepper until soft. Add the corn that you’ve cut off the cobs. Cook for 2-3 minutes just to blend the flavors. Off the heat, finish by tossing with the chopped cilantro and the grated zest of the two limes. Adjust the seasoning to your tastes with salt and pepper.

A series of recipes and articles that I started writing for the Buenos Aires Herald Sunday supplement, Food & Wine section, at the beginning of 2012. My original proposal to them was to take local favorite dishes and classics and lighten them up for modern day sensibilities. We’re not talking spa or diet recipes, but at the very least, making them healthier in content, particularly salt, fat and portion size. As time went by, that morphed into a recipe column that, while emphasizing food that is relatively “good for you”, wasn’t necessarily focused on local cuisine. At the beginning of 2013 I decided to stop writing for them over some administrative issues, but it was fun while it lasted.

Facebooktwitterredditpinterestlinkedinmail